HYENA
Well, that took forever! As soon as I mapped out the year, thinking I’d do 8 six-week projects and blog about their INSPIRATION at the midpoint and the PROCESS at the end, I fell off the horse and have barely climbed back on. Still, with all the technical challenges this go-round, there have been a few successes I can build on for the next head on my list.
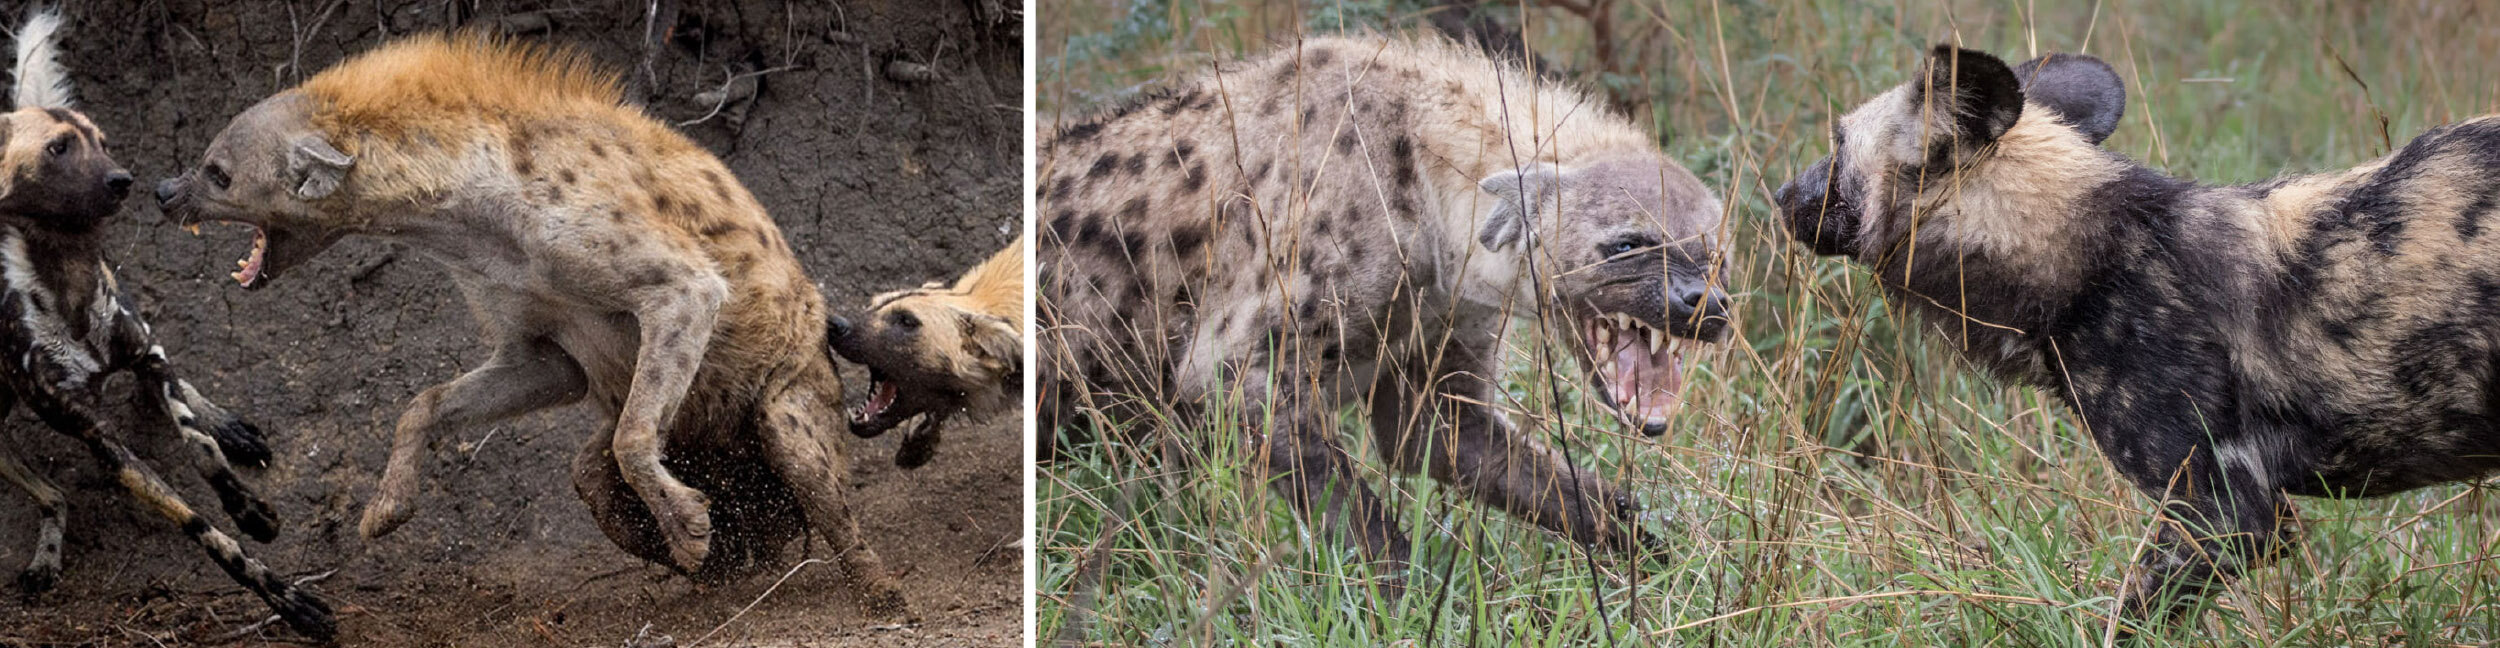
Visual References for HYENA. Note the length of the neck and the way the elbows jut out. Oh, and the lovely smile.
For more on hyenas and why I’m drawn to such an ungainly creature, check out this INSPIRATION blog post:
https://johnlauerart.com/blog/bacon-hyenas-amp-how-to-wrap-5-eggs

L: initial sketch/ C: first steps in modeling/ R: starting to block out the inner head.
Hard to believe this would turn into anything, but already you can see an inner beast starting to rear up. The reference drawing is from the classic, Artistic Anatomy by Dr. Phil Richer, the most beautiful anatomy book I’ve seen. The software I use is T-Splines for Rhino, but Rhino 7, just out, has new sub-d tools which will do nearly the same thing, so I may be switching over soon. For more detail on my ‘puter-to-paper process, check out this blog post:

The road not taken. L: intersecting inner and outer forms/ C: inner form extending through forehead/ R: ribcage.
I frequently keep multiple schemes going and work back and forth until one emerges as the most doable. It was important in HYENA that the dark inner form would be made by flipping the surface of the lighter outer form back on itself so that one form was the reverse side of the other. Intersecting surfaces would not do. What I chiefly disliked about this direction, though, was how the inner hyena head became too obviously a mask for the outer human form. The two heads need to be more intertwined and visually inseparable. The ribs I rather liked and will return to on another piece. The time I spent exploring how to structure them was pulling me away from finishing the head(s).

The finished “organic” model.
Sadly, what was meant to be elbows and forelegs jutting out look more like droopy Bugs Bunny ears and the evil grin just looks dopey. Still, I forged ahead, thinking that not entirely liking a piece would free me up to experiment more with the later stages.

L & C: converting fully organic surfaces into those that can be flattened and cut out of paper/ R: each surface gets a number.
There are actually a lot of choices to be made when figuring out how each 4-sided quad of the surface will bend. It comes down to which edges will flow continuously and which will abruptly stop and change direction. While I lose some smoothly rounded transitions at this stage, I also gain more definite edges that sharpen the form and catch the light nicely. I like to think it recalls the sharpened lines in traditional Northwest Coast masks without being remotely imitative.

Two-thirds of the sheets cut by my trusty digital die cutter. I’m so thankful I don’t have to cut these by hand.
I assemble the piece by matching the number on the cut-out piece of paper to the number on the digital model. I have my system down; it’s not that hard to keep track.

Assembly underway. Individual paper strips are taped edge-to-edge and glued from the inside with a squeeze bottle equipped with a tiny nozzle, like piping a cake. The joints are stronger if I later remove the tape and coat the exterior with matte medium or clear gesso.
At this stage I was pleased to find that the shoulders are providing a nice sturdy base. No wonder why busts traditionally include them, duh. The curved spine is also doing its job holding the head in place. The tongue I thought would provide another point of balance, but I think because I didn’t provide a direct connection to the upper lip area, it really isn’t doing much structurally.
Unfortunately, at this stage I was also finding out that …

Structural mishaps. L: center post I regret having to add/ R: warped surfaces subdivided into long skinny strips that can twist.
… Oops, the mouth is not connecting and the head is sinking into the chin. A lesson I’m relearning all the time: if I want the structure to be integral with the skin —and I do— then best I develop it while I’m still modeling the skin, and not try to shoehorn it in after the form is set. A closed form would be easier to structure, but I want an open form made by a surface twisting and turning on itself to create a double head. I also don’t want to be too obvious with the structure, which makes the fact I ended up with a center post blocking the open cavity of the mouth especially bothersome. I may never show this piece in public because of that.
For future heads, I’m thinking now of:
starting with a kind of curving, viny framework made of 3-sided truss-like members also made of paper. The framework would provide a secure place to attach individual pieces of paper to and pin them in the correct position in space.
subdividing warped surfaces into long skinny strips that can twist and turn more easily.
painting in full color. I have a number of strategies for doing it so it looks integral with the way I construct the heads. See problems with painting paper below.

The assembled paper head, in white. Bigger than I thought it’d be.
The reverse surface of the paper really needs to be a different color so you can see the outer human head turning itself inside out to become the darker beast inside. Still testing how best to do that, and when: Once completed? It’s mighty hard to get my brush into all the hidden corners and to get an even paint surface. Before I cut? If I soak and stretch the paper as with traditional watercolor paper, I risk weakening the paper, especially as I need to paint both sides. If I staple and paint without soaking first, I get a sheet full of waves that don’t sit flat. That clearly won’t do.
Intricate areas with many joints and smaller pieces of paper are somewhat easier to paint. They also get stronger as the joints are filled. The relatively simpler areas with larger, broader, flatter pieces of paper are the more problematic as they’re most likely to buckle and warp. Not a good look.
So many more experiments to do. So many heads ahead.